Saturday, 27th August, 2022.
It's been a while since my last confession. A lot has happened in the last five and a half years. Not least of which was a permanent relocation to rural Lincolnshire. I have my own garage, no need to rent a "lock-up" any more, and a reasonably comfortable workshop, no need to work outside any more (and an excellent pub just 4 minutes walk away). Life is good!!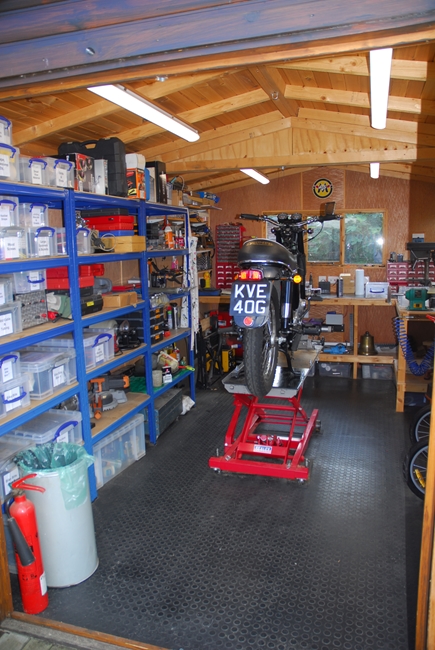 What with the move etc. and acquiring a few more bikes... I now have a stable of 6... I haven't ridden Lilly as much as I'd have liked. That said, however, she has covered a couple of thousand miles since being rebuilt. If you've read Part 1 of this saga, you'll perhaps remember that I did very little to the engine's internals. At the time, I deemed them good enough and she still has her original bore, pistons, cams, etc. With hindsight, I probably should have rebuilt the engine as well as the cycle parts, as she has become noticeably more noisy, mechanically, of late. So... today, Lilly was brought into the workshop for some T.L.C.
Sunday, 28th August, 2022.
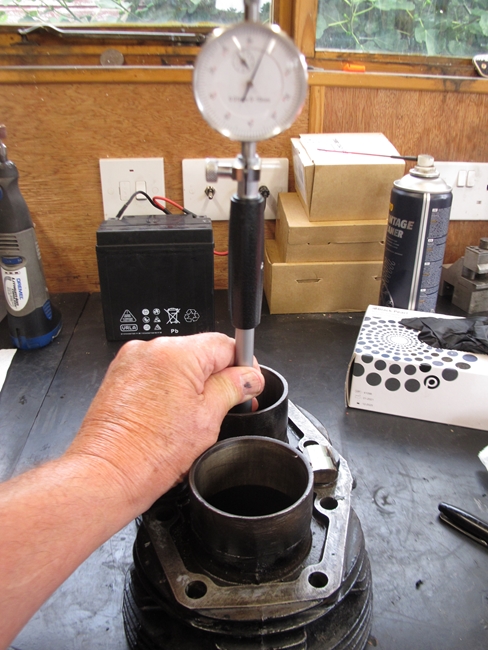 Having got Lilly up onto the workbench, I've gone as far as to remove the cylinder head and barrel. I wanted to check the wear in the bore and I could detect a significant amount of "for and aft" movement of the pistons at T.D.C. As it turned out, the bore wear was less than I thought there'd be. Using my accurate, 3 point contact bore gauge, zero'd at the bottom of the bore, parallel to the gudgeon pin where the wear should be negligible, I measured the difference at the top of the bore at right angles to gudgeon pin. I have to say, it wasn't much; less than I had expected, given the amount of movement of the piston. The left hand bore was 0.03mm larger at that point and the right hand bore was 0.05mm larger. That's hardly enough to justify a re-bore but it was obvious that the pistons were worn as well, so on balance, I think a re-bore and new pistons is probably the way to go.
Tuesday, 6th September, 2022.
Having taken the barrels off, it seems a bit daft not to go the whole way so I'm about to take the engine out. I'll strip it completely this time and check the wear on the big ends and on the timing side main bearing bush. Probably replace the drive side ball race as a matter of course. I've been in touch with T & L Engineering and they can carry out whatever work is needed. I'll probably have the exhaust valve seats replaced with hardened steel items. That way I can run on un-leaded petrol... for as long as it's available!!!
Thursday, 8th September, 2022.
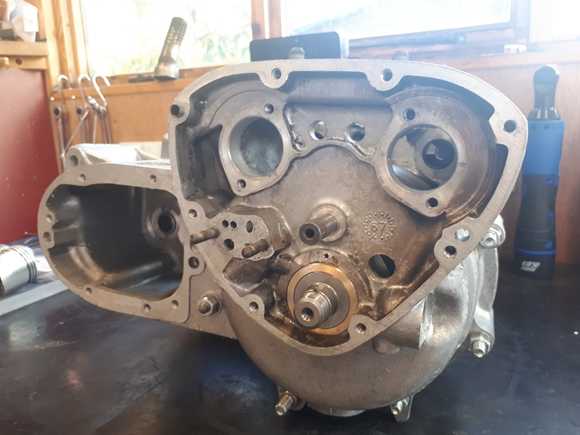
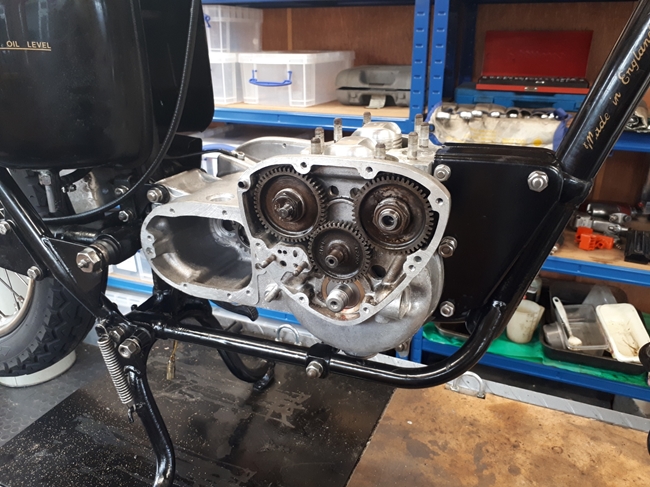
Good news and bad news... The good news is that I've managed to strip the engine down to the crankcase and crankshaft. I've not split the cases yet as I'm waiting for some bolts to arrive for the service tool. The camshafts, camshaft bearings and cam followers are all in very good condition and will not need replacing.
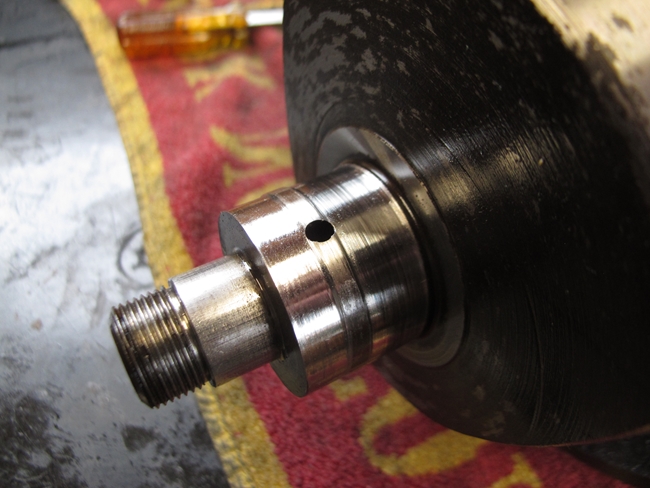
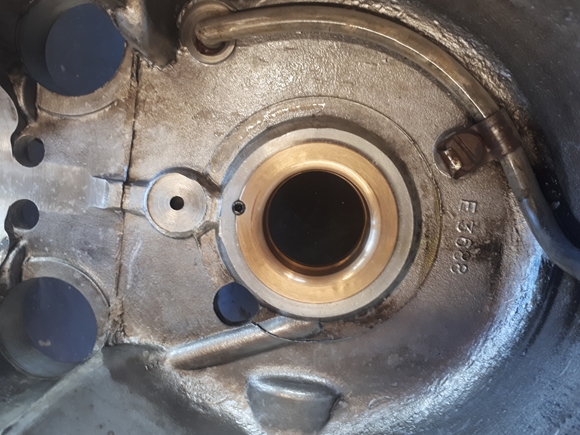
The bad news is that the timing side main bearing bush is totally shot. There is at least a 0.020" gap between the bush and the crankshaft journal. Specified running clearance is 0.0005" - 0.0015". That's a big difference!! I won't know until I split the cases how much of that wear is on the crankshaft journal and whether the crank will need to be re-ground and an undersize bearing bush fitted. Ho hum!!
Sunday, 11th September, 2022.
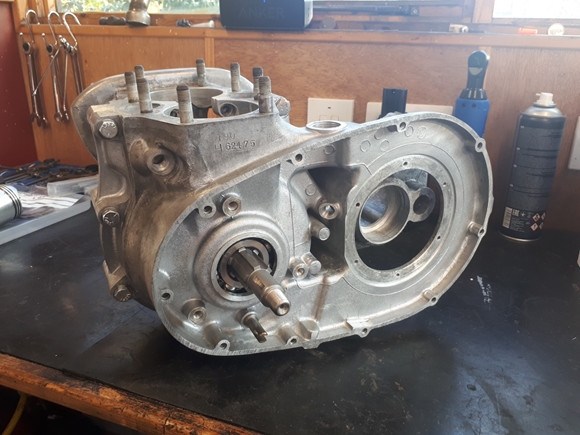
 Double bummer... More good news and more bad news. The good news is that having split the cases and taken the connecting rods off the crankshaft, the big end journals are OK. They are still exactly on tolerance at 1.4375" and perfectly round with no hint of ovality. They will not need re-grinding, but I will fit new bearing shells to the connecting rods as a matter of course.
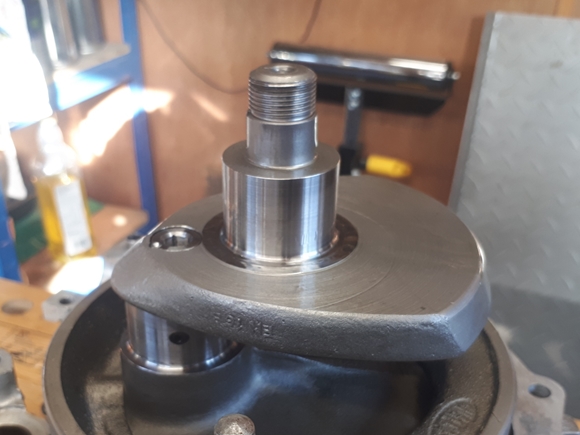
The timing side main bearing is another matter. The crankshaft journal is very badly worn... in places, it's 0.018" undersize. That will mean a serious regrind. I have options, but first off, I will drop the cases and crankshaft into T & L Engineering for their appraisal and go from there. In the meantime, I've pulled out the crankshaft sludge trap. There is 54 years worth of debris in there that needs to be cleaned out. I'll put a new tube in, and of course, replace the screw plug when it all goes back together. I've been sourcing the parts that will need to be replaced... gaskets, bearings and oil seals for the most part. I suppose it could have been worse!!
Tuesday, 13th September, 2022.
As I said in the last paragraph, I have options. I've been in touch with Patrick Seager at Seager Engineering Ltd., in Suffolk. They are a specialist engineering company dealing with engine reconditioning. Basically, they would regrind the main bearing journal just enough to clean up the wear. They manufacture their own bearing bushes from a high lead content bronze alloy which will resist wear. One of these would be shrunk into the crankcase, then precision bored and finally honed to give the correct clearance (0.0005" - 0.0015") on the re-ground journal. The whole lot would be meticulously cleaned ultra-sonically. It's not the cheapest option, but there's and old saying... "Do it right, do it once!". It may well be the way to go. I'll think on it some.
Thursday, 22nd September, 2022.
OK... I've thought on it some. I've also been to see Patrick Seager, taking the crankshaft and crankcases with me. It would seem that under normal circumstances, my T90 crankshaft would be scrap. To grind the worn journal enough to clean up the wear would make it a little smaller than the minimum sizes for a standard undersize bearing bush. I have options...
(1) Scrap the crankshaft and try to source a decent used item.
(2) Leave the crankshaft with Seager Engineering for them to grind the main journal and make (and fit) a one-off timing bush to suit.
Lets look at option (1). A search on the internet did not produce a single T90 crankshaft, in good condition or otherwise. It did, however, throw up a small number of T100 cranks. They are identical dimensionally, but would have been balanced for the heavier 500cc pistons. Cost of a good S/H crank, varies but around £250. The cost of a regrind and new shells, call it £200. Then the crank would have to be dynamically balanced for the smaller, lighter pistons. Basset Down charged me £322 to balance the T120 crankshaft so option one is going to cost in the region of £775.
Lets look at option (2). Patrick Seager has quoted £401 for the complete repair. It's more than I was expecting to have to pay but, hey ho... it's only money. I left the bits with them and await a phone call telling me to go and pick it up.
Monday, 26th September, 2022.
While the engine bottom end is away being repaired, it was time to have a look at something else that bothered me a bit when I put the bike together in 2016. That was the oil filter. Not the filter per se, but how the oil lines were routed. At the time, I was working in my back garden and didn't have the facilities that I now enjoy. Maybe I could come up with something better now. The oil filter is, of course, an after-market kit that I've added myself. The bike was never designed to incorporate a filter so the choice of where to fit one was a bit limited. Under the gearbox seemed the best option but it's not perfect.
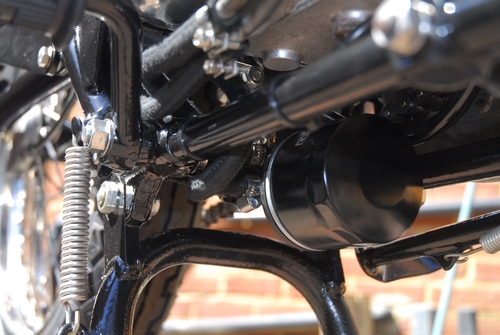
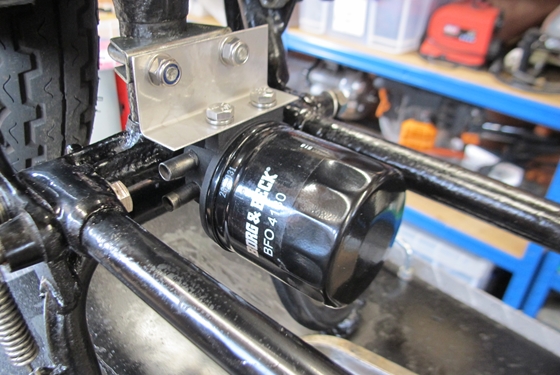
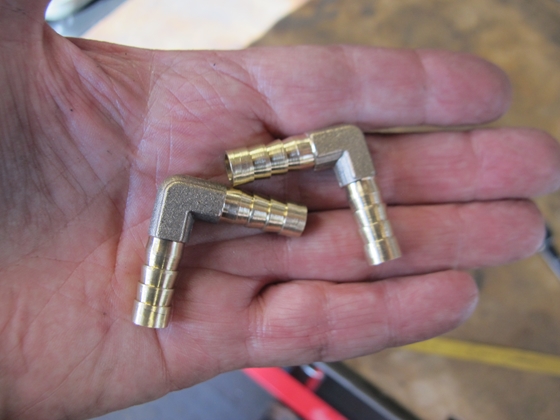
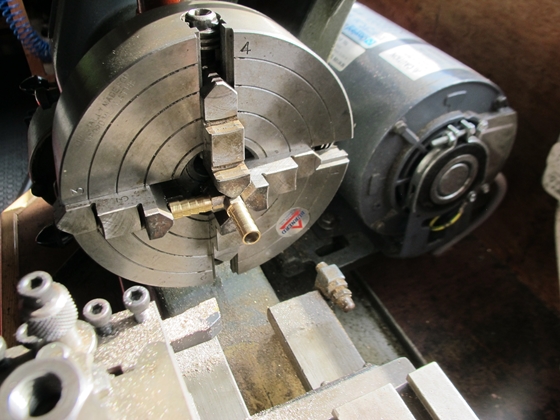
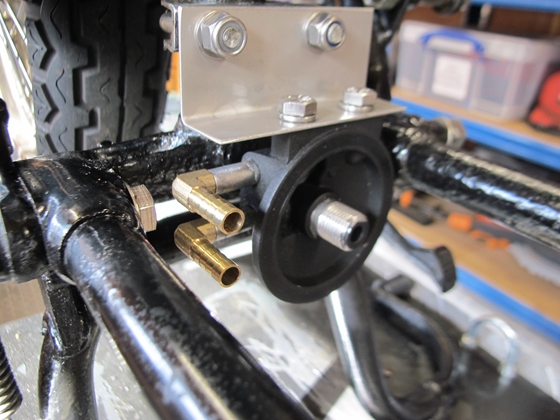
The problem is that the inlet and outlet connections on the filter housing are pointing in the wrong direction. Ideally, I think they should be pointing towards the front of the frame, not across it. It's not really feasible to turn the filter through 90° but I could possibly modify the connection pipes. I though of various ideas to achieve that, but in the end, the KISS (Keep It Simple, Stupid!) solution is usually the best. I acquired a couple of right angle hose connectors of approximately the right size. With a little modifying, I thought that they might work admirably. I set them up in the lathe using a four jaw chuck, and took a few thou' off the diameter of one arm, so that it was a push fit into the existing connection pipes on the filter housing. That certainly looked OK when offered up to the frame. I could fix them permanently, using Loctite 638 or I could silver solder them in. Either way will work but I'll wait until I can offer up the crankcase before I fix them. It may be that they will work better if angled up or down slightly, but I won't know that until the engine oil connections are in place.
Thursday, 6th October, 2022.
I've been thinking, this last couple of weeks. Financially, the world seems to have gone mad. Energy prices are going through the roof, and that's taking just about everything with it. Food is costing a lot more than it was 6 months ago; diesel is close to £2 a litre, and it's time to review my expenditure. How much do I NEED to spend on Lilly, and how much of what I wanted to spend is really necessary? OK... The crankshaft rebuild is necessary but more expensive than I'd hoped. Does she really need to have the valve seats changed? Honestly, probably not. With five other bikes to ride, I'm not going to be putting thousands of miles on the clock. In reality, she's done less than 4,000 miles since I bought her. For the amount I'll ride her, lead replacement additive will be perfectly adequate. Does she need a rebore...? again, in all honesty, she doesn't. The bore wear is minimal, but I would like to replace the pistons.
Monday, 31st October, 2022.
The engine bottom end is still with Seager Engineering. I 'phoned Patrick a few days ago and he said that it would be at least another couple of weeks before the job was completed. Ok, so I suppose that there's no hurry, the weather is changing and I wouldn't be riding the bike until next Spring, anyway. I decided not to have the head modified, and it is now back together after being cleaned and de-coked.. The valves were spun in the lathe and cleaned before being lapped with fine grinding paste. That's now ready to go back on the bike sometime in the (hopefully) not-too-distant future.
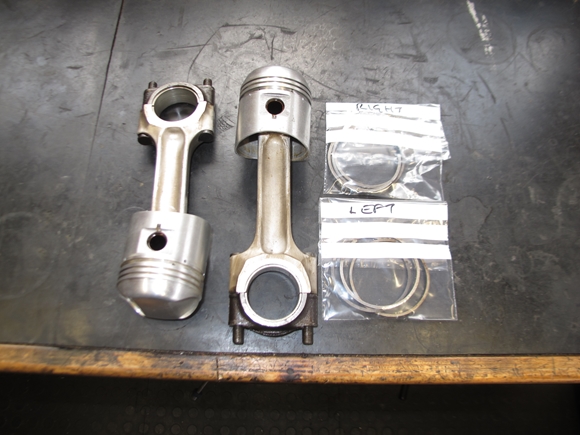
Pistons... I had a little good fortune there. After a fairly thorough search on t'interweb, it seems that the only replacement pistons available are from L.F.Harris or the Australian JP pistons. Both are roughly the same price at around £140 a pair. Then a pair popped up on eBay. They were genuine, "New, Old Stock" Triumph items, still covered in the protective grease/lanolin/whatever that they had been stored in. They were up for £45 or "Make an offer". I immediately offered £40 and got them. That was a result... They've been cleaned and inspected... they're perfect. They've been fitted to the connecting rods and will be installed in due course. The new rings that came with them have been "gapped" and put aside for later assembly. The pistons do look small on the conrods designed for the T100 500cc engine. Just need the bottom end back, now.

Saturday, 12th October, 2022.
I spent last week end with friends in London, and it was while I was down there, I received a 'phone call from Patrick Seager. The work on the bottom end had been completed and was ready for collection. So on Tuesday, instead of coming home straight up the A1, I diverted into Suffolk to pick up the engine. It wasn't until today that I actually removed the wrapping and had a look at what Patrick had done. I have to say that I'm impressed with the quality of the work. It certainly looks the business and I'm looking forward to hearing it run again. I'm sure that a lot of the 'clatter' will have disappeared.
Monday, 14th October, 2022.
The bottom end is back together and in the frame. The camshafts are back in but I had to heat the gear wheels in order to fit them to the camshafts. I've left the crankshaft pinion off for the time being, for a reason that I'll come to later. The gear cluster has been re-assembled to the inner gearbox cover. That's now back in the gearbox case. The primary drive has been re-instated and the oil lines have been connected to the oil tank and engine.
 As I mentioned up the page aways, I had a look at re-routing the oil lines to the filter. To be honest, in the end I decided to take the filter off. That particular filter configuration didn't make for sensible hose layout, even with the 90° adaptors that I made. It may be that at some future time I revisit it and look at an alternative filter location, or indeed, a completely different filter. Whatever... it's more that probable that the task will fall to a future custodian.
Tuesday, 15th October, 2022.
The first rule of putting something back together is to make sure that you HAVE put everything back together. In this instance, I hadn't and realised this morning that when I put the gearbox back together yesterday, I had omitted to put the selector arm detent spring and plunger back before installing the gear cluster and inner cover. That meant that it all had to come apart again... Not just the gearbox but the primary drive as well. Ho hum...
Once that had been rectified, and before I went any further, I wanted to make sure that the oil system was working correctly with the new timing side main bearing. This is why I haven't put the crankshaft pinion back. With a spanner, or in this case a cordless ratchet driver and socket on the exhaust camshaft nut, and the idler pinion in place, I could drive the oil pump a lot faster than by turning the engine over via the crankshaft. I filled the oil tank with fresh 20W50 and spun the camshafts until oil was pumped out of the oil pressure relief valve. Happy with that, I installed the crankshaft pinion.
 Having sorted that and gearbox outer cover, the only other thing I wanted to do was install the cylinder barrel. I fitted the pre-gapped piston rings and then the piston ring compressor bands. The cylinder block slipped easily over the pistons with no drama. The drama came when I unscrewed the compressor clamps and a small part of one of them, that I thought was 'captive', proved not to be the case and the 'tinkling' noise I heard was this small part dropping into the crankcase. I had visions of having to take the whole thing apart again, and uttered that immortal phrase "Oh dear". This time, luck was on my side. The small cylindrical part had landed on the flywheel and rolled down to lodge against the inlet camshaft. Fortunately, I could retrieve it with a 'magnet on a stick', and breath a sigh of relief.
Monday, 12th December, 2022.
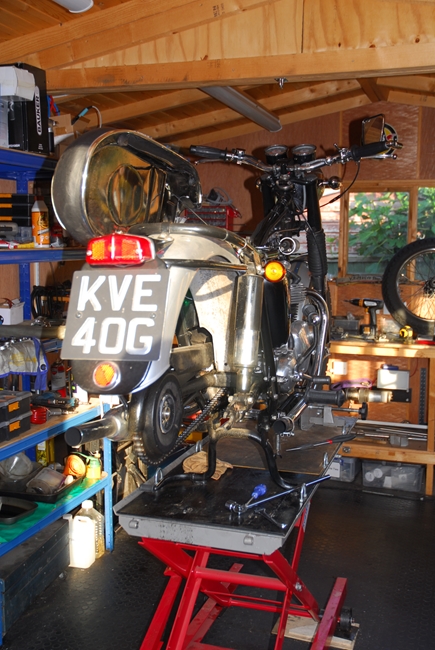
Despite life getting in the way of rebuilding Lilly, she is now finished. There was only one minor "hiccup" and that was only discovered when I poured some petrol into the tank. The fuel tap leaked like the proverbial sieve as the corks had dried out and shrunk. In the end, I replaced the push-pull style of tap for a new lever type with synthetic seals. I also took the opportunity to make up a new fuel line from the tap to the carburettor with hose suitable for E10 petrol. She fired up reasonably easily and settled down to an even tick-over. The oil is returning to the tank correctly so that's just about it, for now. I hereby declare that Lilly is once again ready for the road, but that will have to wait until Spring.
Thursday, 3rd August, 2023.
 Well... Spring has been and gone. It's now what we Brits call "Mid-Summer", although the weather has been anything but Summery. I did, however, manage to take Lilly for a ride down to the Strathmore. On the whole, the bike behaved perfectly. The engine spun freely and didn't miss a beat. She seems completely oil tight, which is good news. The is some bad news, though. On the way home, the speedometer stopped working. I had noticed that the needle had been bouncing a little and not as smooth as it was, so when it stopped working, I assumed that the inner cable had broken and carried on. When I got home, I discovered that the speedo drive gearbox had destroyed itself, spun with the wheel and destroyed the cable completely. Ok... not a big deal in the great scheme of things. I've ordered a new gearbox, cable and spacer from that nice Mr. Grin in Scotland. When they arrive, I'll put it all back together again. Ho hum.... One of these days, one of my old bikes will make it down to the Strath and back without something going wrong. I live in hope....
Friday, 11th August, 2023.
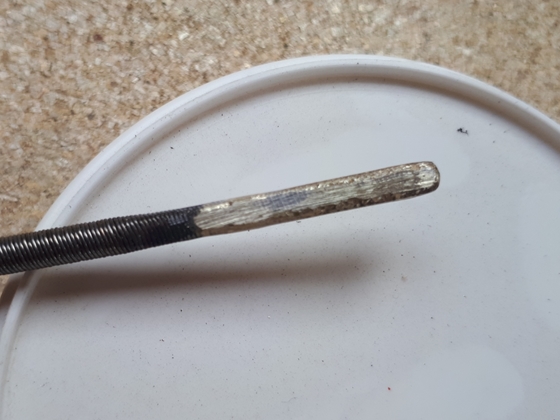
Who'd have thought that replacing a speedometer drive gearbox and cable would turn out to be so frustratingly bloody difficult. Not physically fitting the bits to the bike, that's easy, but getting the right bits in the first place. The rear wheel drive gearbox and a new cable arrived from Grin's a few days ago. I put it all back together, spun the rear wheel, and... nothing. Not a flicker from the speedo. I disconnected the cable from the speedometer and spun the wheel again... The inner cable wasn't turning. Hmmm.... It turned out to be the square section, formed on the end of the inner cable was too small. The gearbox was sized to fit a cable with the square section 1/8" across the flats. I measured my old cable... 1/8". I measured the new cable... 3mm across the flats and it wasn't formed that well having rounded corners. The result being that the drive gearbox output was turning but was not driving the inner cable. I complained to Mr. Grin. Turns out that all his cables, obtained from LF Harris, had the 3mm square. I returned the faulty cable and he refunded me the cost. So... I ordered another cable on-line from The Classic Bike Shop. Guess what... yep, that was exactly the same. The advice I got was "wrap a bit of foil round it". I have some 1/8" square brass tube and that fits into the gearbox perfectly. Maybe I can do something with that. I'll think on it some.
Another potential problem that I've found is with the Speedometer head. It's a magnetic instrument rather than the chronometric instruments that are fitted to my earlier bikes. The magnetic mechanism is held into the case with threes screws that have rubber grommet type bushes to give a little flexibility and vibration resistance. It seems that during the 65 years this speedo has been around, the rubber bits have perished and disintegrated, meaning that the internal mechanism is floating about more than is desirable. Unfortunately, unlike the chronometric instruments that have a screw on bezel, the magnetic version has a bezel that is spun over and can't be removed without destroying it, and I have no way of spinning a new one on anyway!! Something else for me to think about.
I have a few options; speedometer head first. I've found a company on t'interweb that specialise in magnetic instruments. I've filled in a contact form on their website and as I type this, I'm waiting for a reply. Alternatively, changing it for an electronic instrument would cure both problems. A replica of the magnetic one is available for a couple of hundred quid. I also have an electronic speedo, and pulse sender unit in the cupboard. It was fitted, briefly, to my Matchless G80CS. That could be fitted almost immediately, but the style doesn't match the tachometer and it would look a little odd. The electronic options would mean some serious re-wiring, but it's an option if the repair of the magnetic one doesn't work out.
As far as the cable goes, again, I have options. Venhill specialise in custom cable and I know that they (did?) make speedometer cables. I've filled in the contact form on their website, asking if they can make an inner cable to a drawing or pattern. That's one option... Just this instant had a reply from them... Yes, they will. That's one option, then. Or I could modify the end on the cable I have. One thought is to apply some silver solder the the sides of the square, then dress it down to the correct size. I may well try that on the old cable to see if it would work.
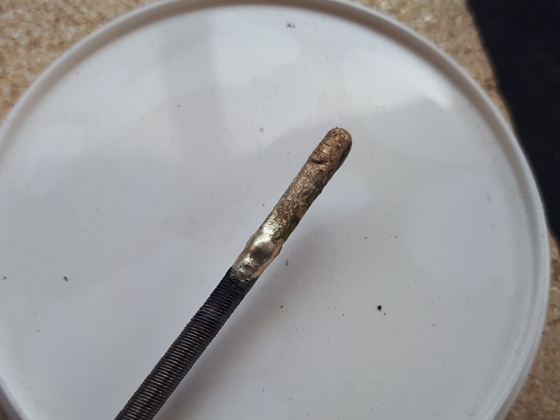
Well. I've just tried that last method and it worked fine. I applied some silver solder and dressed it back down until it was a light push fit into the gearbox. It doesn't look that different, and in truth, it's only a few thou. But it's that few thou that makes the difference between working and not working, so as far as the cable goes... sorted.
Saturday, 12th August, 2023.
An enquiry on the Norton Facebook Group page gave me the name and contact details for a guy who repairs magnetic speedometers. His name, Ashley Pople located in Farnborough, Hampshire. As he was recommended by the majority of people that responded, I gave him a call and explained the problem. Not a problem at all, as it turns out. He would do a complete service, including replacing all the perished rubber bits for a very modest sum. As I posted the speedometer to him last evening, Special Delivery, it should be with him on Monday morning.
Monday, 22nd July, 2024.
 It's been almost a year and Lilly is back in the workshop. Not that there's anything really wrong with her, I just noticed the the front fork gaiters had split again. The pattern reproduction rubber parts are really rubbish but that's all that is available. I've sourced what I hope is a good quality pair, and today I've started to take the front forks apart in order to fit them. Not a big job, just a bit time consuming, getting all the bits off so that I can drop out the fork legs.
Saturday, 28th June, 2025.
The fork gaiters were changed without any drama and Lilly was consigned to the back of the garage, where she remained until recently. I'm pushing 80, now, and don't ride as much as I would like. With five (shortly to be six) other bikes to ride, I'm afraid Lilly, and my 350cc Matchless have been a bit neglected. A couple of weeks ago I had all the bikes out of the garage and moved Lilly up to "Pole" position. So last Wednesday I took her for a run down to my old "local"... The Strathmore Arms in St. Paul's Walden, a round trip of 150-160 miles depending on which route I take, and there are options!!
Lilly ran like a dream, not missing a beat and hitting speeds that I'm not going to quote here. Suffice it to say that we were hitting 6,500 r.p.m. in top gear at times. It wasn't without issues, though. The indicator switch proved to have become unreliable, and I had to hold it on to ensure that it remained indicating. The riding position needs to be altered slightly. The handlebars are pretty flat and I found that I was putting a lot of pressure on my thumb joints. That meant that with a bit of arthritis in my hands now, they were aching by the time I got home. So... things are about to change.
The indicator switch and the combined horn and dip switch have been removed and stored. The handlebar has been taken off and also stored in case I need them sometime in my rapidly diminishing future. A new handlebar with a slightly higher rise and more rearward sweep have been acquired. That should sort out the riding position. I've also bought a replica LUCAS left hand switch cluster as fitted to the early T140's. That combines the indicator switch, dip switch and horn button. The old chrome plated clutch and brake levers will be replaced with polished alloy items at the same time.
Link to Index and Home Page.
Link to Triumph T90 - Part 1.
Link to Triumph Bonneville T120R page.
Link to AJS M18S page.
Link to Matchless G3/LS page.
Link to Matchless G80CS page.
Link to Honda VFR750 page.
Link to Norton 650SS page.
Last updated 28/06/2025